Difference between revisions of "Pay Code Item Editor"
Jump to navigation
Jump to search
| Line 28: | Line 28: | ||
To edit a pay code - click on it's name in the list of pay codes and this will open up the edit screen. | To edit a pay code - click on it's name in the list of pay codes and this will open up the edit screen. | ||
| + | |||
| + | =Related Pages= | ||
| + | [[Pay Codes]] | ||
Revision as of 06:19, 15 January 2018
About
The Pay Code Item Editor is used to manage the pay codes that you use in your PinvoiceR system.
How to Add/Edit a Pay Code Item
Click on System then Set Up then select the Pay Code Item Editor link. From here you will see a list of the current pay code items in you system;
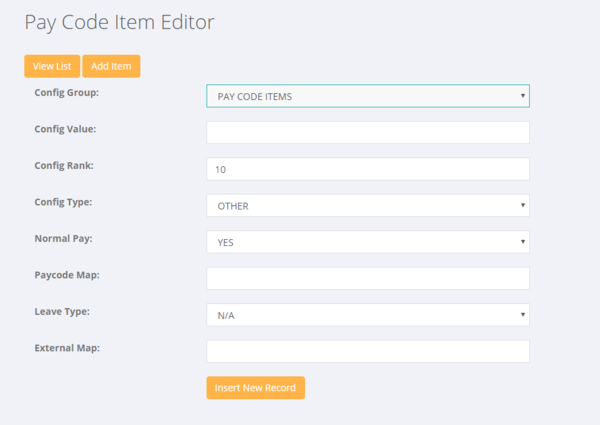
To add a new pay code item click on the Add Item button. Then use the form to enter the relevant details for the pay code.
Enter in the following fields:
- Config Value = Pay Code Item Name - eg enter 'Car Allowance' if you want a pay code item called Car Allowance - note this is the field that is shown on an employee's pay
- Config Rank = This is the order that you want the pay code to appear - eg on entering hours or on payslips or on invoices
- Config Type = Usually this is set to Hours (options are Hours, Leave, Other)
- Normal Pay = This is whether this is included in the normal pay calculations (eg in NZ should it be treated as gross earnings or is it an irregular payment and so excluded - so would if excluded would not attract annual leave etc)
- Paycode Map = This is used to map pay code items to the Pay Interpreter in PinvoiceR
- Leave Type = This is used if you are adding a Leave Paycode item to map back to the type of leave it is
- External Map = This is used where a system requires paycode items to be mapped to an external system - eg custom integration
To edit a pay code - click on it's name in the list of pay codes and this will open up the edit screen.

