Difference between revisions of "2-Step Authentication"
| Line 12: | Line 12: | ||
2. At the PinvoiceR screen enter your logon details as normal and click Login. | 2. At the PinvoiceR screen enter your logon details as normal and click Login. | ||
| − | 3. You will then see a screen showing Two Factor Authentication and a barcode - open the Google Authenticator app on your phone and click the <b>+</b> to Scan a barcode - then use the camera on your phone to scan the bar code. If you have trouble scanning the barcode then Authenticator gives you the option of typing in the | + | 3. You will then see a screen showing Two Factor Authentication and a barcode - open the Google Authenticator app on your phone and click the <b>+</b> to Scan a barcode - then use the camera on your phone to scan the bar code. If you have trouble scanning the barcode then Authenticator gives you the option of typing in the "Plaintext Key" that appears on the screen just below the barcode. This is a one-off initialisation process that puts your Authenticator record for PinvoiceR and your PinvoiceR username in sync. You won't see a barcode again. |
Revision as of 01:55, 17 April 2020
About
Two-step authentication is a process that involves two authentication methods performed one after the other to verify that someone or something requesting access is who or what they are declared to be.
How to Use
To set up 2-step authentication you will need to do the following;
1. Download Google Authenticator from the Iphone App Store or Google Play Store and install on your phone.
2. At the PinvoiceR screen enter your logon details as normal and click Login.
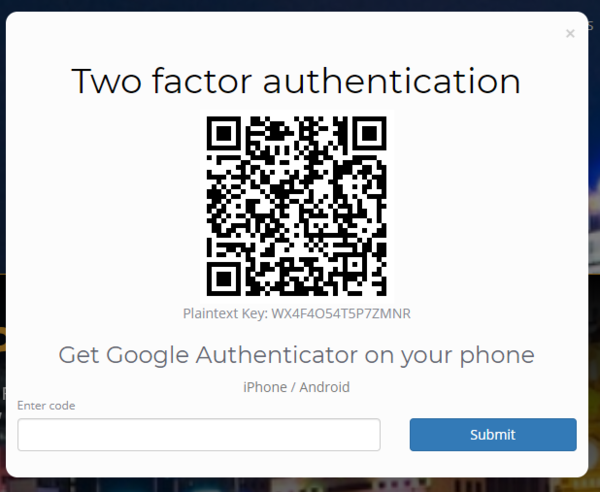
3. You will then see a screen showing Two Factor Authentication and a barcode - open the Google Authenticator app on your phone and click the + to Scan a barcode - then use the camera on your phone to scan the bar code. If you have trouble scanning the barcode then Authenticator gives you the option of typing in the "Plaintext Key" that appears on the screen just below the barcode. This is a one-off initialisation process that puts your Authenticator record for PinvoiceR and your PinvoiceR username in sync. You won't see a barcode again.
4.The Google Authenticator will then give you a numeric code - enter this code on the screen and click the Submit button
Notes
- As a default the expiry for each code (once authenticated) is set to 30 days and you will need to add in a new code after 30 days - ie open the Google Authenticator app on your phone, retrieve a new code, and enter it into PinvoiceR when asked.
- While Google Authenticator is described here there are other applications that will work just as well, e.g. Authy.
- The code you save here will be a unique entry in Authenticator valid for just your username on the one website. Other websites that use this type of authentication will store their codes as separate entries in your Authenticator app.
