In a nutshell: To pay out an employee who is leaving, open Employee > Termination on their record, enter the date, the reason and the leave to pay out, click Save, then Submit. The termination pay then goes through Open Batches like any other pay.
Applies to: Australia
About
The Employee Termination Payments (ETP) screen records why and when an employee left, and creates their final payments: unused leave and, where they apply, redundancy or other termination amounts.
It works in three stages:
- Save stores the form so you can check it.
- Submit creates the termination pay. The form's status becomes SUBMITTED.
- Processing the pay batch pays it. The status becomes PROCESSED and the form can no longer be changed.
The amounts you enter decide what is paid and how it is taxed. If you are unsure which type a payment is, check with your accountant or the ATO before you submit.
Quick Reference
| Part of the screen | What it shows |
|---|---|
| Employee Information | The employee's details and current Leave Balances |
| Effective date | The employee's last day |
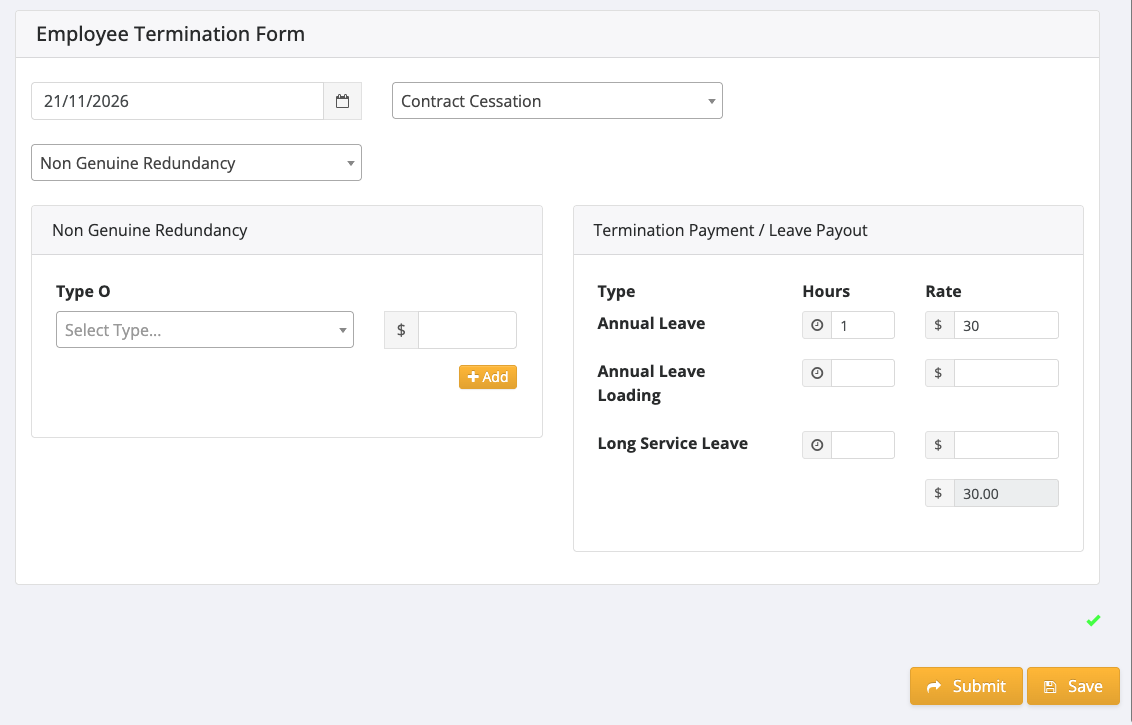
| Cessation Reason | Voluntary cessation, Ill Health, Deceased, Redundancy, Dismissal, Contract Cessation or Transfer |
| Redundancy type | Genuine Redundancy or Non Genuine Redundancy |
| Type O | Other termination amounts, such as Golden Handshake or Gratuity Payment in Lieu of Notice |
| Termination Payment / Leave Payout | Hours and Rate for Annual Leave, Annual Leave Loading and Long Service Leave |
| Save | Stores the form |
| Submit | Creates the termination pay |
Record the termination
- Go to Employees > Search and open the employee.
- Click Employee at the top right, then Termination.
- Check the Leave Balances shown at the top. These are the hours the employee has accrued.
- Enter the effective date and choose the Cessation Reason.
- Under Termination Payment / Leave Payout, enter the Hours and Rate for each type of leave being paid out. The total is shown underneath.
- If other termination amounts apply, choose the type under Type O, enter the amount and click Add.
- Click Save. The message "Successfully Save Termination Payment!" confirms it.
Create and pay the termination pay
- Check the saved form, then click Submit. The message "Successfully Processed Termination Payment!" confirms it, and the form shows SUBMITTED.
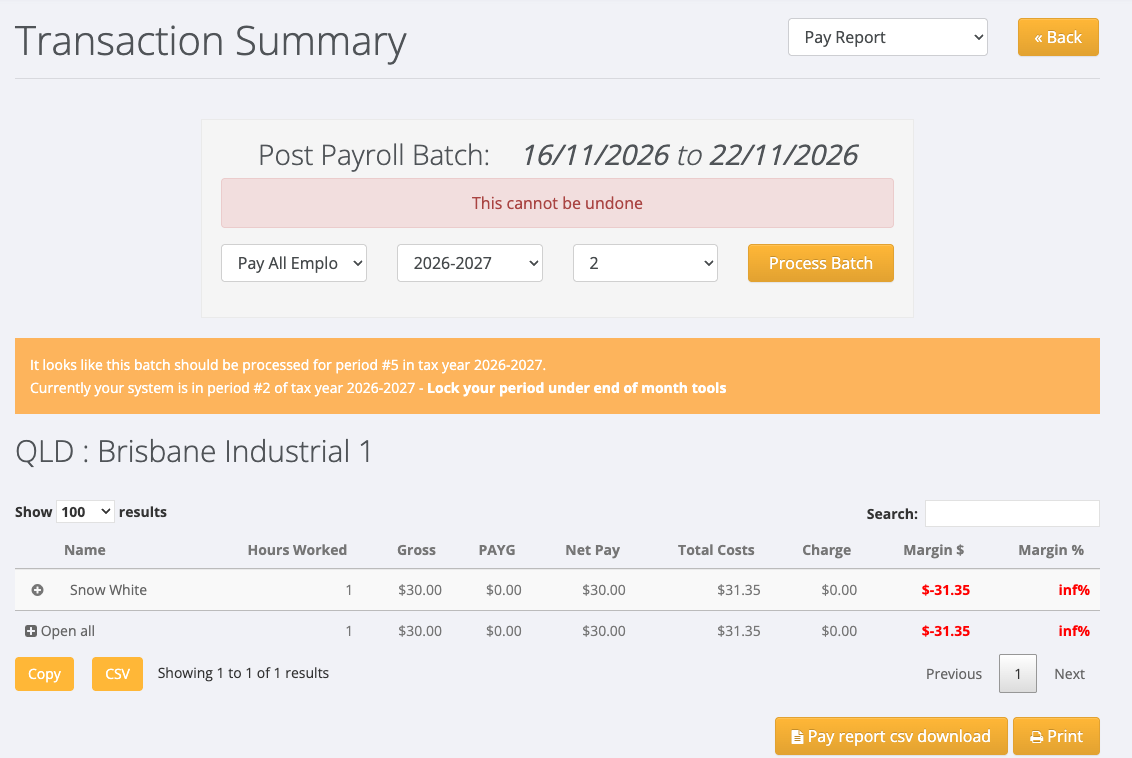
- Go to Payroll > Open Batches. The termination pay is listed under the current pay period. Its rows use the Termination Payments pay code.
- Open the Pay Report, check the amount and click Process Batch. See Processing a Pay Batch.
- Carry on with the bank file, STP and payslip as for any pay run. See A Pay Run from Start to Finish.
After the batch is processed, the termination form shows PROCESSED and its buttons are removed.
Good to know
- Submit creates the pay straight away. There is no second confirmation, so check the form before you click it.
- If you pay out more leave than the employee has, processing the batch shows a notice that the leave balance is negative.
- Until you click Submit you can change the form and Save again.
- "No client and division could be found" on submit means the employee has no order. Add an order for the employee, then submit again.
Make the employee inactive
Paying a termination does not stop the employee appearing in lists. To make them inactive, open their record, click Active at the top and choose Deactivate.
If the termination screen asks you to contact support
For a small number of organisations, termination payments are set up by PinvoiceR support. If the screen shows "Please contact support for termination setup", raise a support ticket.