Difference between revisions of "Permanent Employees - NZ"
| Line 101: | Line 101: | ||
Then click on the <kbd>[Add/Edit Paycode Items]</kbd> link. | Then click on the <kbd>[Add/Edit Paycode Items]</kbd> link. | ||
| − | + | ||
=Related Pages= | =Related Pages= | ||
Latest revision as of 22:31, 15 January 2018
Contents
About
This section deals with Permanent Employees in PinvoiceR for New Zealand customers.
Setting up a Permanent Employee
Once you have added a permanent employee to PinvoiceR you need to set up a number of defaults for their record. After setting the pay frequency (weekly, fortnightly, monthly, 4 weeks), the first thing that you need to do is to set them as a permanent employee - this is done in their record by clicking the Edit Employee button.
From here scroll down to the bottom of the page and set the following;
- Permanent Payroll Division - this is usually an internal division for payroll
- Permanent Payroll Location - this is a "client record" that the person is linked to - generally here you will set up a client location for your business and link to that record
Once added then click on the Edit Annual Salaries link. This will bring you to a page where you are able to add in Salary and Average Hours information. To enter in a new salary fill in the form;
From here you should set the regular pattern of work for that employee - ie what hours they would normally work on each day of the week.
Adding Additional Paycode Items & Allowances
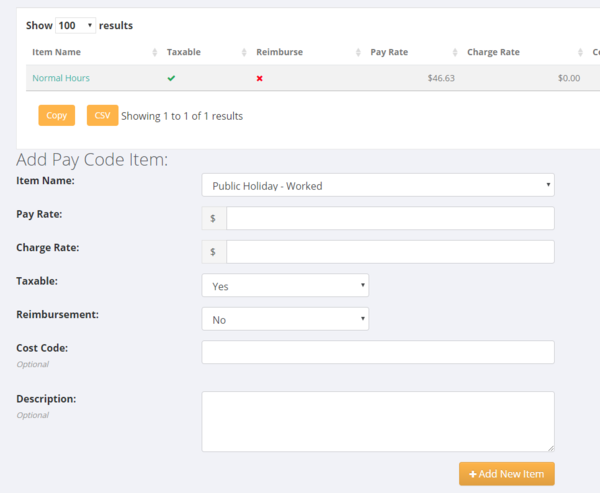
In some instances you will need other pay code items for a permanent staff member (for example a pay code item for bonuses, car allowance etc) and so will need to add these additional items to the Pay Code. To do this, click on the [Add/Edit Paycode Items] link and then the +Add Pay Code Item button.
Enter the required details for the pay code item. Note - if you need to add an item that is not listed as an option in the pay code item fields then add this first by using the Pay Code Item Editor.
Paying Permanent Employees
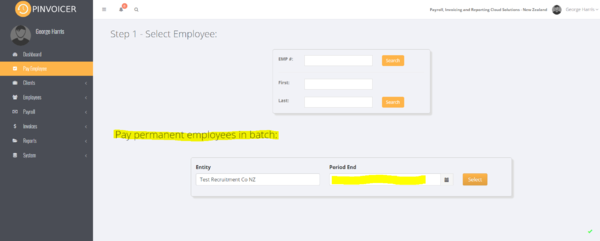
Once your permanent employees have been set up then to create a pay run click on the Pay Employee link in the main menu.
From here, select the entity that you are paying from (if you have more than one entity set up in PinvoiceR) and the period ending that you are planning to pay.
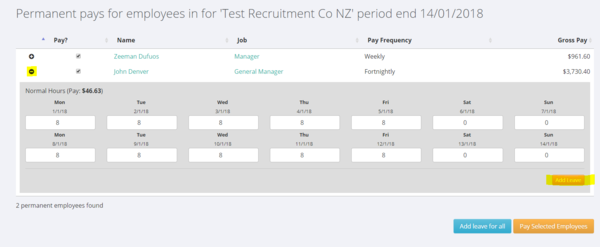
When you enter a date in the date selector the system will then find all permanent employees who are due to be paid in that period (whether they are weekly, fortnightly, monthly or 4 weeks). If they are not due to be paid in that cycle they will not show.
Click on the + icon to expand the pre populated hours for that period for a particular permanent employee. Here you can adjust the hours worked accordingly.
Leave for Permanent Staff
Before you can pay any leave for an employee you need to have the following for each employee;
- # Weeks owed (if transferring data from another system - see Leave Balances - NZ)
- Relevant Daily Pay
- # Days worked per week
- Hours worked per week
To pay leave to an employee click on the Add Leave Button and then select the type day and type of leave. When these are selected the rate and the quantity will populate the form.
Remember - if you are paying leave for a day you will need to adjust their normal hours for that day else you will pay the person for both the leave taken and their normal pay.
Editing Salary Information
To edit Salary information for an permanent employee - From the Edit Employee button scroll down and click on the Edit Annual Salaries link.
Then click on the [Add/Edit Paycode Items] link.


