Difference between revisions of "Receipting"
| Line 29: | Line 29: | ||
[[File:Allocate_receipt.png |800px]] | [[File:Allocate_receipt.png |800px]] | ||
| − | |||
===Adding a receipt from a Client record=== | ===Adding a receipt from a Client record=== | ||
Revision as of 02:00, 9 April 2018
Contents
About
You are able to use PinvoiceR to manage your debtors and send statements of accounts. In order to do this you will need to receipt payments directly into PinvoiceR.
How to use
You can add a receipt either from the main menu (ie click on Invoices and then the Receipting links) or at a client level (ie find a specific client record and click on the + Add Payment button.
Adding a receipt from the Main Menu
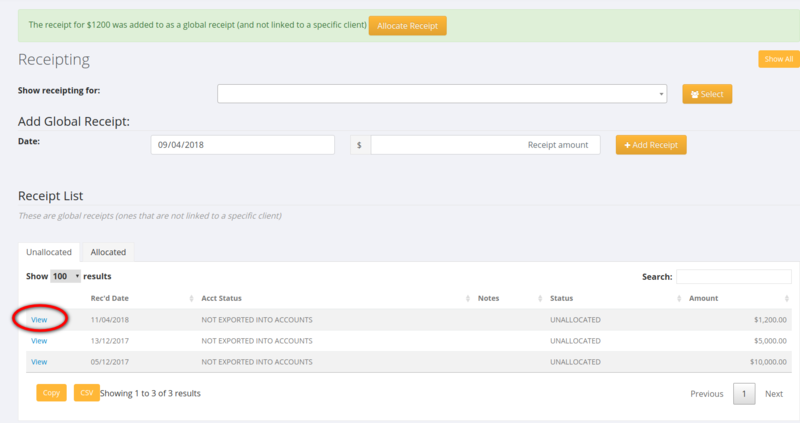
If you are adding the receipt from the Main Menu then the process is to add date and amount and then you will find the client that it is related to for the allocation process.
To allocate - click on the View link
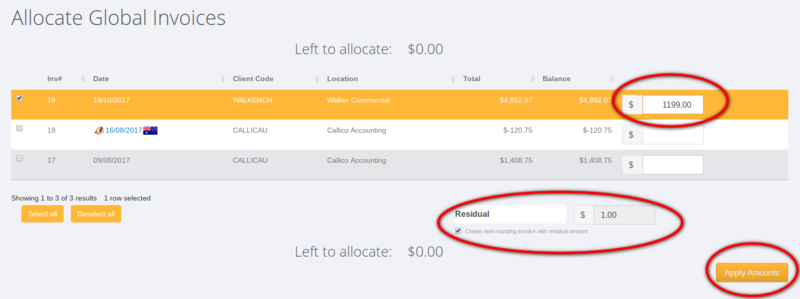
Then select the invoice (or invoices) that you wish to allocate the receipt to. By default, the amount to allocate to each invoice will be the receipt amount (or the amount of the invoice) but you can alter this where needed.
Where there is a minor difference between the amount received and the invoice amount - eg the customer has over paid by $1.00 you may wish to create a rounding invoice/credit note rather than to require the customer to pay (or refund to the customer) the residual amount. If this is the case - enter the Residual Amount and click the Create new rounding invoice with residual amount.
When the full receipt amount has been allocated correctly, click the Apply Amounts button.
Adding a receipt from a Client record
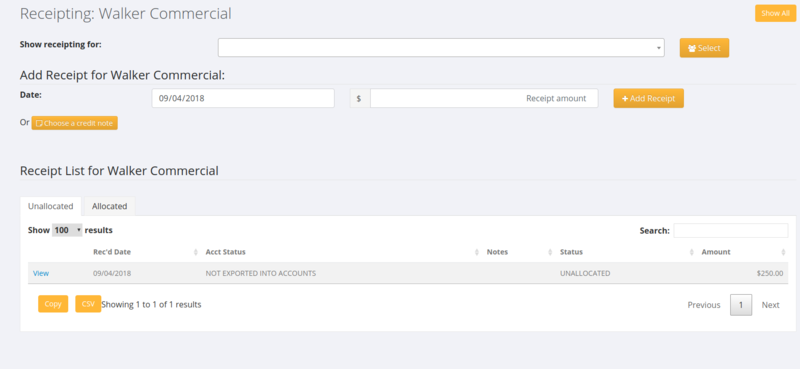
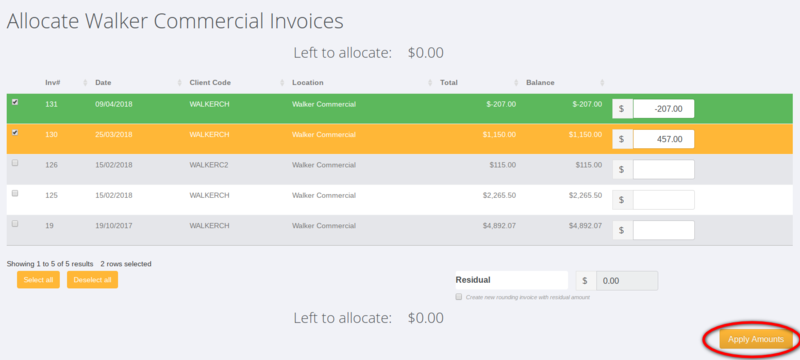
If you are adding a receipt from a client record the process to allocate it is much the same but it will only show invoices and credit notes for that client.
Click on the View link to allocate the receipt. Then select the relevant invoices/credit notes to allocate the receipt to and click the Apply Amounts button.


