Difference between revisions of "Credit Notes"
| Line 55: | Line 55: | ||
=Related Pages= | =Related Pages= | ||
| − | *[[Invoices]] | + | * [[Invoices]] |
| + | * [[Current Transactions]] | ||
| + | * [[Edit Invoice Rows]] | ||
Revision as of 05:47, 23 January 2018
Contents
About
Credit Notes are used to make adjustments to previously sent invoices.
How to use
To Create a Summary Credit Note
This type of Credit note is simple one line credit note which provides for an explanation of the credit note and then the credit amounts and tax.
To create this type of credit note follow the Add Invoice process but select the document type to be a Credit Note rather than an invoice.
To Create a detailed Credit Note
In some instances you will want to create a detailed credit note - eg putting in the pay code items and quantities that need crediting. To do this - the process is much the same as Paying Employees which you can do from clicking on an order on Pay Employee.
Below is an example where we are issuing a credit note but not adjusting an employee's pay. In this instance we are using the Pay Employee method (but the same can be achieve by clicking on a relevant open order and entering hours.
Click on the Pay Employee link from the main menu. Then select the relevant employee that you are creating the credit note for - enter either;
- Employee Number
- First Name
- Last Name
Click the Search button.
You are then shown a list of the potential employees - select the one you want to create a credit note for and click the Select Employee button.
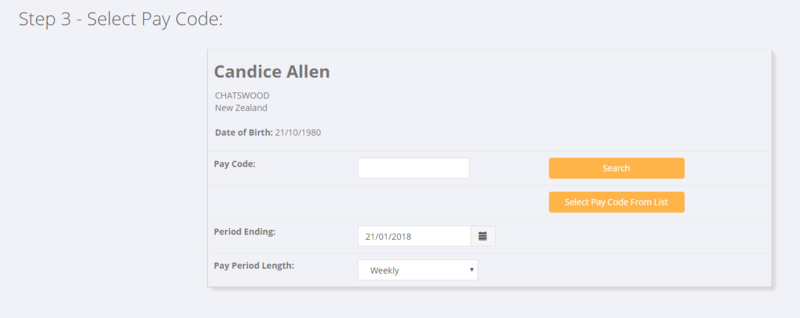
From here you need to select the correct Period Ending Date & Pay Period Length. For the Pay Code - either enter the pay code id & click the Search button OR if you do not know the pay code id click the Select Pay Code From List button.
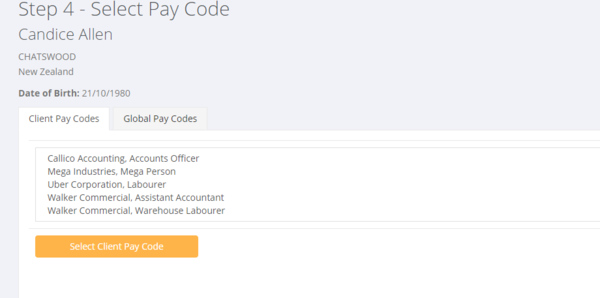
If you click the Select Pay Code from list button then the next screen gives you the option to either select a Client Pay Code or a Global Pay Code - select the one that you wish to use for this credit.
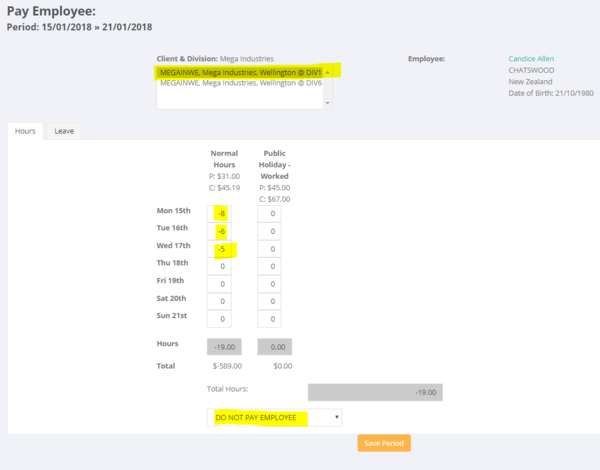
From here you have the normal hours entry screen and you can enter the details you need for the credit note;
- Make sure that you have the correct billing location selected
- enter in negative hours where you wish to have a credit
- Select the Transaction type to be "DO NOT PAY EMPLOYEE" (if you are not adjusting the employee's pay - per this example. Leave as NORMAL if you are adjusting the employee's pay - noting that unless you are also paying the employee in this period you will not be able to create a negative pay)


