Permanent Employees - AU
Contents
About
This article is about how best to set up and pay Permanent Employees (for Australian customers) in PinvoiceR.
How to use
Before you start
Before setting up a permanent employee it is likely that you will want to account for the costs involved with permanent employees in different general ledger accounts to the general ledger accounts used for the costs involved with Temporary/On Hired employees. If this is the case then you should have a separate division set up for internal employees - eg an Agency has an Adelaide office, they would have a division for "Adelaide Office" and "Adelaide Office - Internal"
Additionally, it is worth setting up a billing location for your agency, as this is needed for assigning costs (as some clients also charge/on hire permanent staff).
Creating the Employee Record
For a permanent employee, it is unlikely that they will also be in a front end system (eg RecruitOnline) and so you will need to create their record in PinvoiceR.
The easiest way to do this is to use the PinvoiceR Onboarding process (ie where they will complete all of the necessary payroll information). The other option is to add them manually.
Set an Employee as Permanent
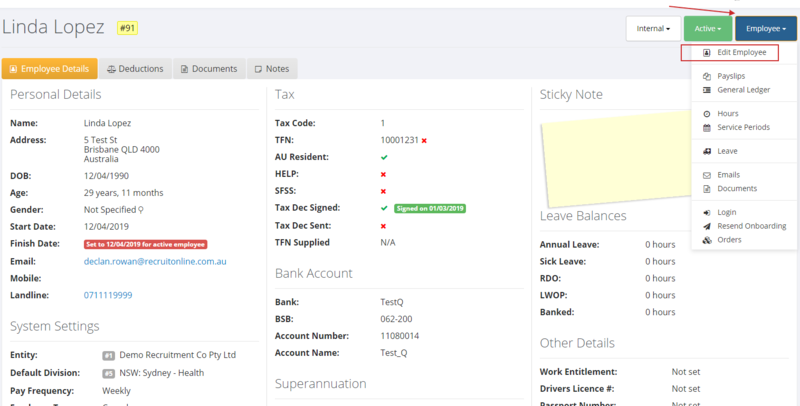
Once the employee record has been created (ie you do not have to wait to have all of the onboarding information completed), edit the record.
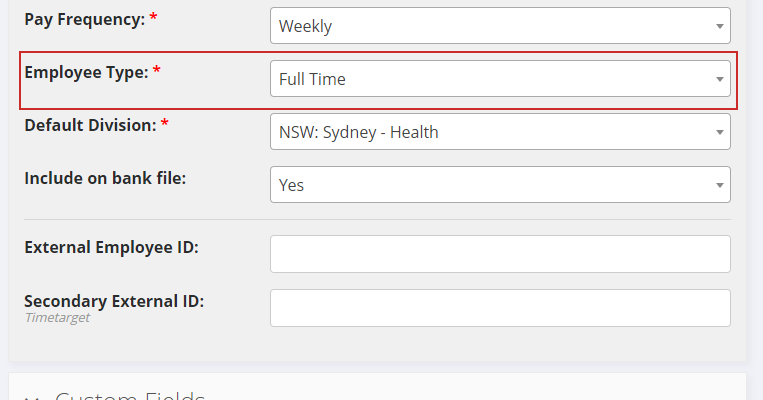
When editing, if not already done set their employee type to Full Time (also check that you have the correct Pay Frequency set) and click the Save Form button;
Then edit the employee record again so that the Permanent Options are visible. Then set the Division & Location and click the Save Form button;
Set an Employee's Salary & Pay Code Items
Edit the employ and scroll down to click the Edit Salary button. Enter in the relevant salary information and click the Add New Salary button;
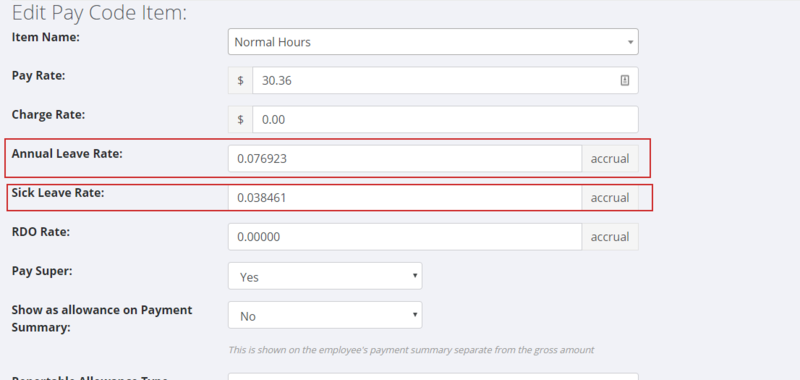
Click on the Add/Edit Pay code Items link to add additional pay code items and also to add in accrual factors (ie annual leave, sick leave etc) for each pay code item you need.
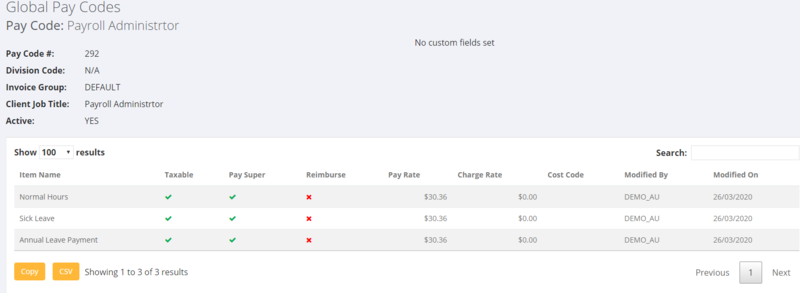
Example with typical paycode items added;
Set Daily Average Hours
From the salary added screen (you can get this by clicking on the Edit Salary button) there is a section to add in the Daily Average Hours for the employee. These are the default hours that are used when paying permanent employees.
Enter the hours for each day (ie what hours the employee would normally be paid for) and click the Update Hours button.
Paying Permanent Employees
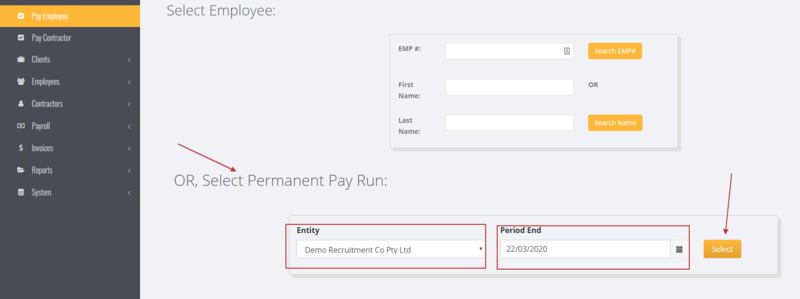
Once you have set up your permanent employees, then to pay a pay run click on the Pay Employee link from the main toolbar and scroll down and select the relevant entity and pay period ending.
Then click the Select button.
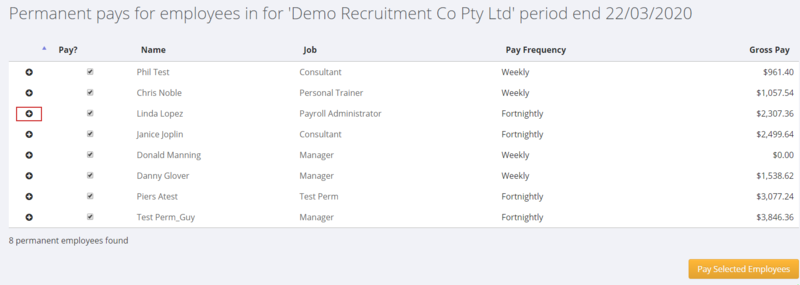
The next screen will show all employees who will be in the pay run. Click on the + sign to see the pre-populated hours
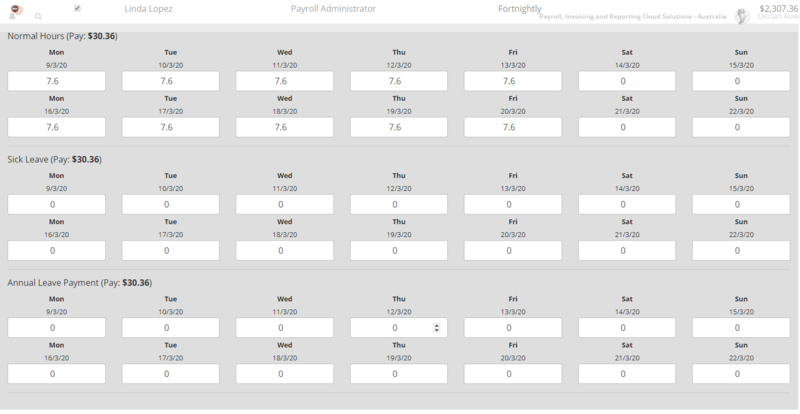
When you click on the + sign you can then change the pre-populated hours as needed - noting that if you wanted to pay someone annual leave you would need to have an annual leave pay code item on their salary before you get to the permanent pay run.
When ready, click the Pay Selected Employees button. This will add the transactions into the system and they will be ready for processing as normal in Open Batches.
