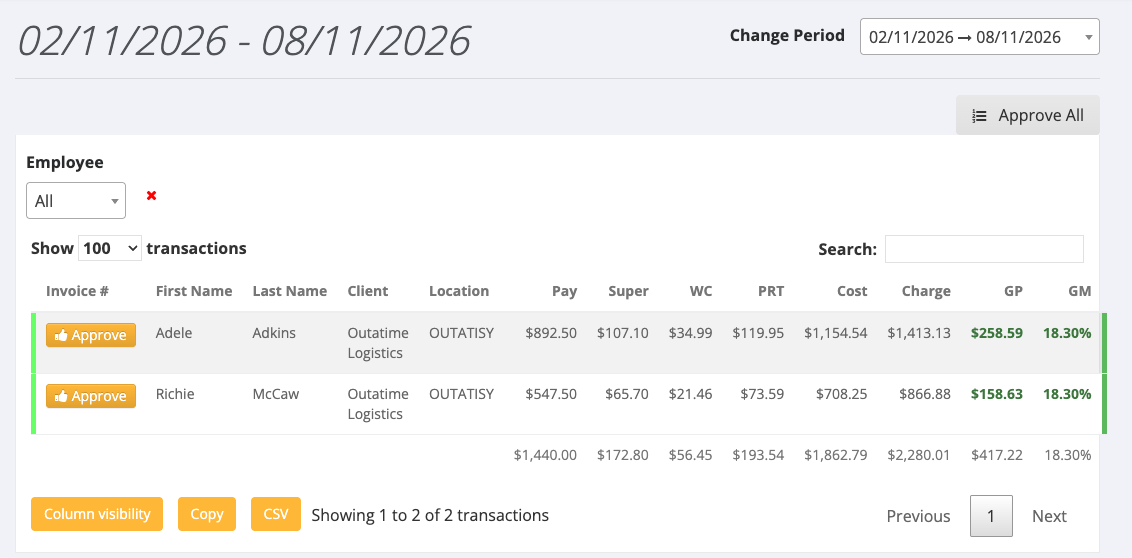
In a nutshell: Pays that can be charged to a client appear in Invoices > Current Transactions. Click Approve on a transaction to create the invoice, or Approve All to create invoices for the whole period.
Applies to: Australia and New Zealand
About
When hours are entered for an employee on a client's order, PinvoiceR creates a transaction with a pay amount and a charge amount. Current Transactions lists the transactions for a pay period that have not been invoiced yet. Approving a transaction turns it, and the other transactions that belong on the same invoice, into an invoice.
How transactions are grouped into invoices is decided by the client's Invoice Split setting.
Quick Reference
| Part of the screen | What it shows | When to use it |
|---|---|---|
| Change Period | Pay periods with the number of transactions in each, and Uninvoiced transactions | Choosing the period to invoice |
| Approve | Opens the invoice for that transaction | Creating one invoice |
| Approve All | Every client and location with transactions in the period | Creating all invoices for the period |
| Approve Invoice | Creates the invoice | After checking the lines and totals |
| Approve as manual | Creates the invoice as a manual invoice | When the invoice needs editing afterwards |
Approve one invoice
- Go to Invoices > Current Transactions. The latest period opens.
- To work on a different period, choose it in Change Period.
- Click Approve on a transaction.
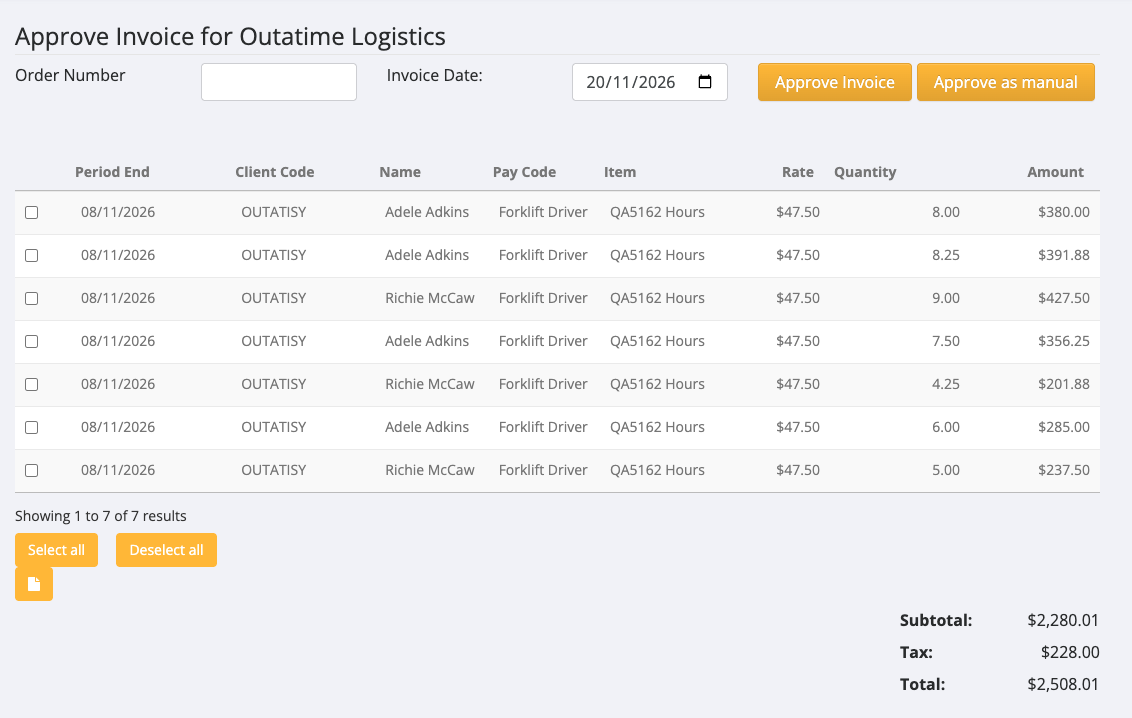
- Approve Invoice for the client opens. Check the lines: Period End, Client Code, Name, Pay Code, Item, Rate, Quantity and Amount.
- Check the Subtotal, Tax and Total.
- Enter an Order Number if the client needs one, and check the Invoice Date.
- Click Approve Invoice.
Approve every invoice for a period
- On Current Transactions, click Approve All.
- Approve transactions in the period opens, with the total at the top and each entity below. Use Expand all to see the clients and locations.
- Leave Invoice all ticked, or untick the clients you do not want to invoice yet.
- Check the Invoice Date.
- Click Approve to create the invoices, or Approve & Send to create them and email them to the clients.
If an invoice cannot be created
A message about a default billing location, such as "does not have a default billing location set", means the client or client group needs a default billing location. Set one on the client, then approve again.
After approving
- Find and send invoices from Invoices > Invoice Report. See Sending Invoices.
- Export invoices to your accounting system from Invoices > Export Invoices. See Exporting Invoices.