In a nutshell: In New Zealand, each pay run is reported to Inland Revenue through payday filing. Go to Payroll > Payday Filing to create the files, then upload them in myIR.
Applies to: New Zealand
About
Payday filing replaces the monthly schedule. Every payday is reported to Inland Revenue, along with details of employees who start or leave. PinvoiceR creates the files; you upload them yourself in myIR.
A batch appears in payday filing under its pay date, which it gets when its bank file is downloaded. See Downloading the Bank File (New Zealand).
Quick Reference
| Item on the Payday Filing screen | What it is for |
|---|---|
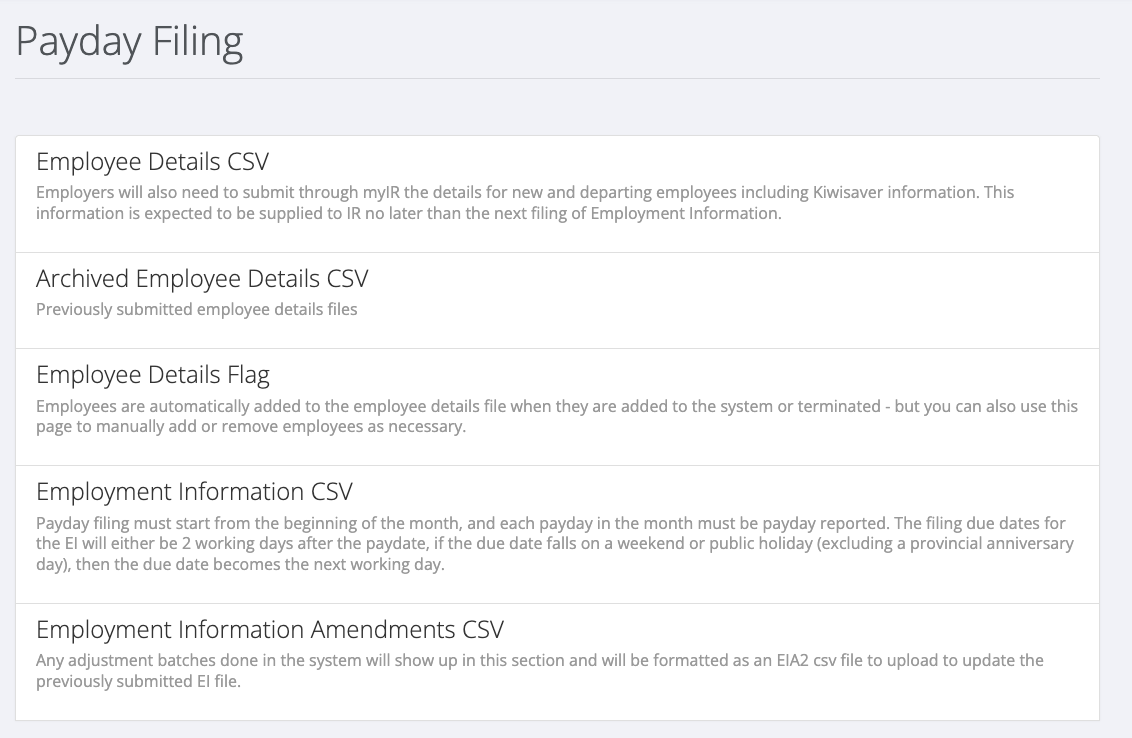
| Employee Details CSV | The file of new and departing employees, including KiwiSaver information |
| Archived Employee Details CSV | Employee details files you have already submitted |
| Employee Details Flag | Add an employee to, or remove them from, the next employee details file |
| Employment Information CSV | The file for each payday: who was paid and what was deducted |
| Employment Information Amendments CSV | Corrections to a payday already filed, created from adjustment batches |
File a payday
- Go to Payroll > Payday Filing and click Employment Information CSV. Employment Information Paydays opens.
- Choose the Entity.
- On the Queued tab, find the Pay Date. Each row shows the number of Employees and the Batches included.
- Click View on that row, check the details and create the file.
- Upload the file in myIR.
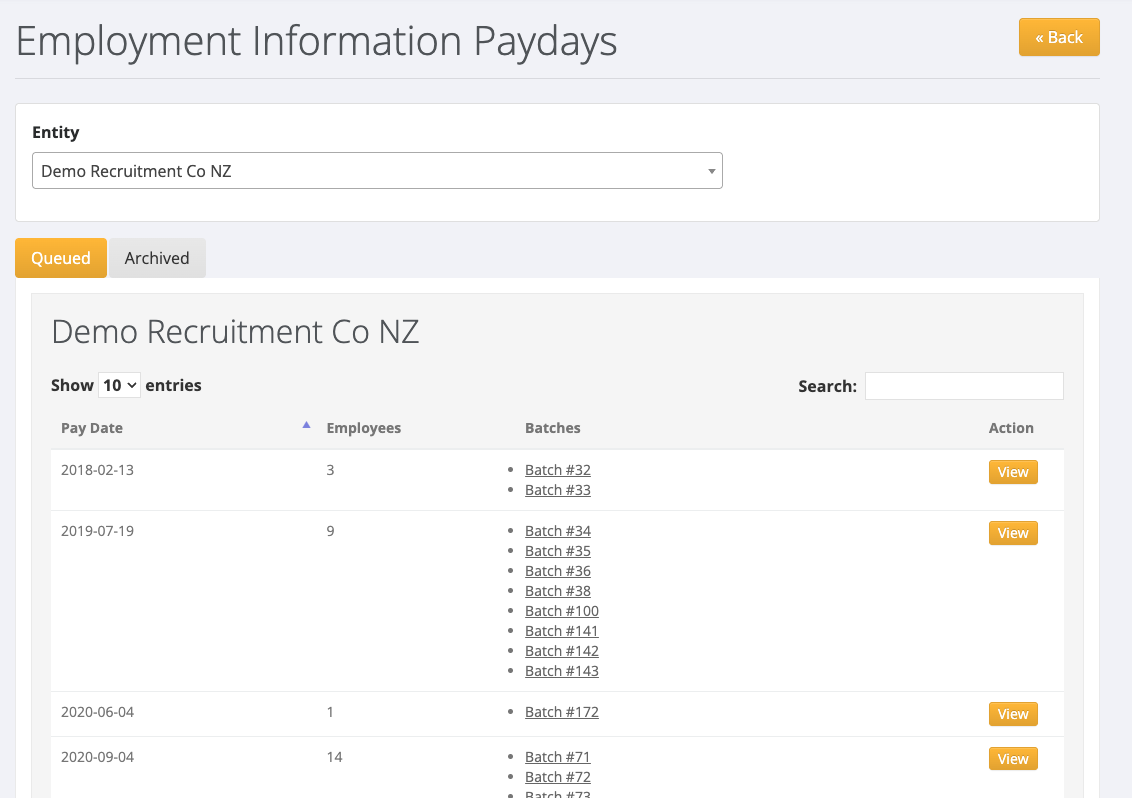
Paydays you have already dealt with are on the Archived tab.
Payday filing must start from the beginning of a month, and every payday in the month must be reported. As the screen explains, the employment information is generally due 2 working days after the pay date. Check the due date for your situation with Inland Revenue.
Send new and departing employees
- On the Payday Filing screen, click Employee Details CSV.
- Choose the Entity and click Select.
- Create the file and upload it in myIR.
Employees are added to this file automatically when they are added to PinvoiceR or terminated. Inland Revenue expects these details no later than your next employment information filing.
To add or remove an employee by hand, use Employee Details Flag.
Correct a payday already filed
Corrections are made with an adjustment batch. Once the adjustment batch is processed, it appears under Employment Information Amendments CSV, where PinvoiceR creates an amendment file to upload in myIR.
- On the Payday Filing screen, click Employment Information Amendments CSV.
- Choose the Entity.
- On the Queued tab, click View on the batch and create the file.
If a payday will not open
If clicking View returns you to the list with a message naming an employee, for example that an employee "has a finish date before their start date", that employee's record needs correcting. Open the employee, fix the dates, and try again.
Other IRD files
Reports > IRD has the older file formats: EDF - IR345, EMS - IRD348 and KED (KiwiSaver Employment Details).